
How ReturnPing works
From purchase to deadline, everything stays clear.
Add only the details that matter, choose your reminders and update the purchase as things change.
Purchase→
Deadline→
Reminder→
Action completed
Product walkthrough
Five steps from purchase to follow-up.
Use only the details, dates and reminders that apply to each purchase.
- 01
- 02
- 03
- 04
- 05
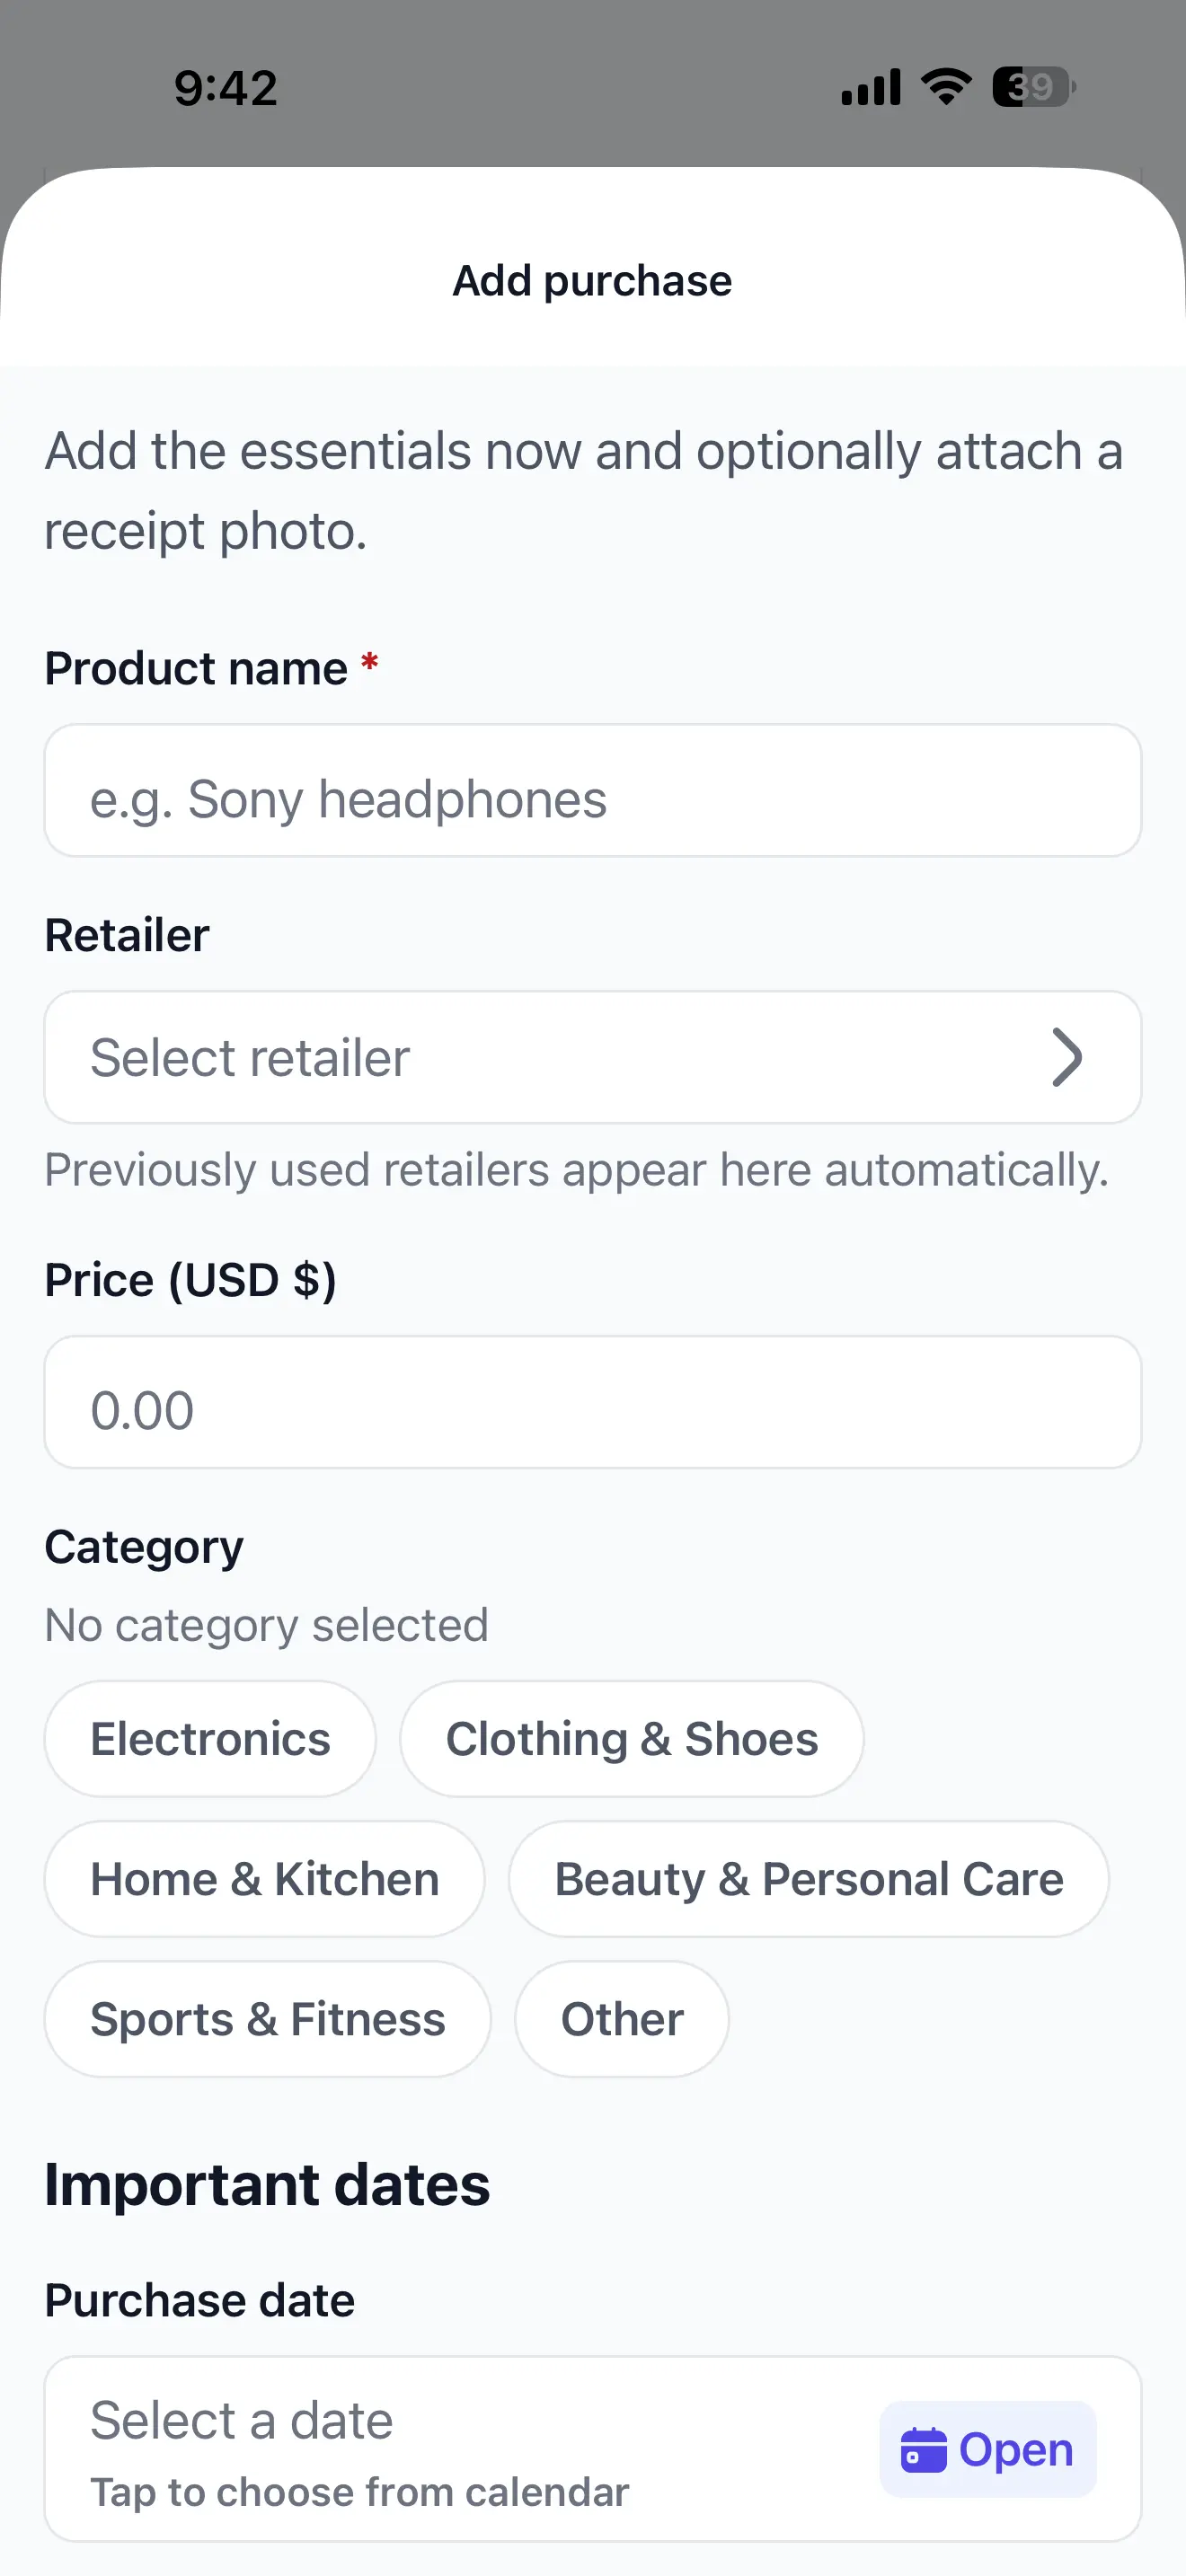
Step 1
Add your purchase
Start with the core details that identify what you bought.
- Product name
- Retailer
- Price
- Purchase date
- Category
Step 2
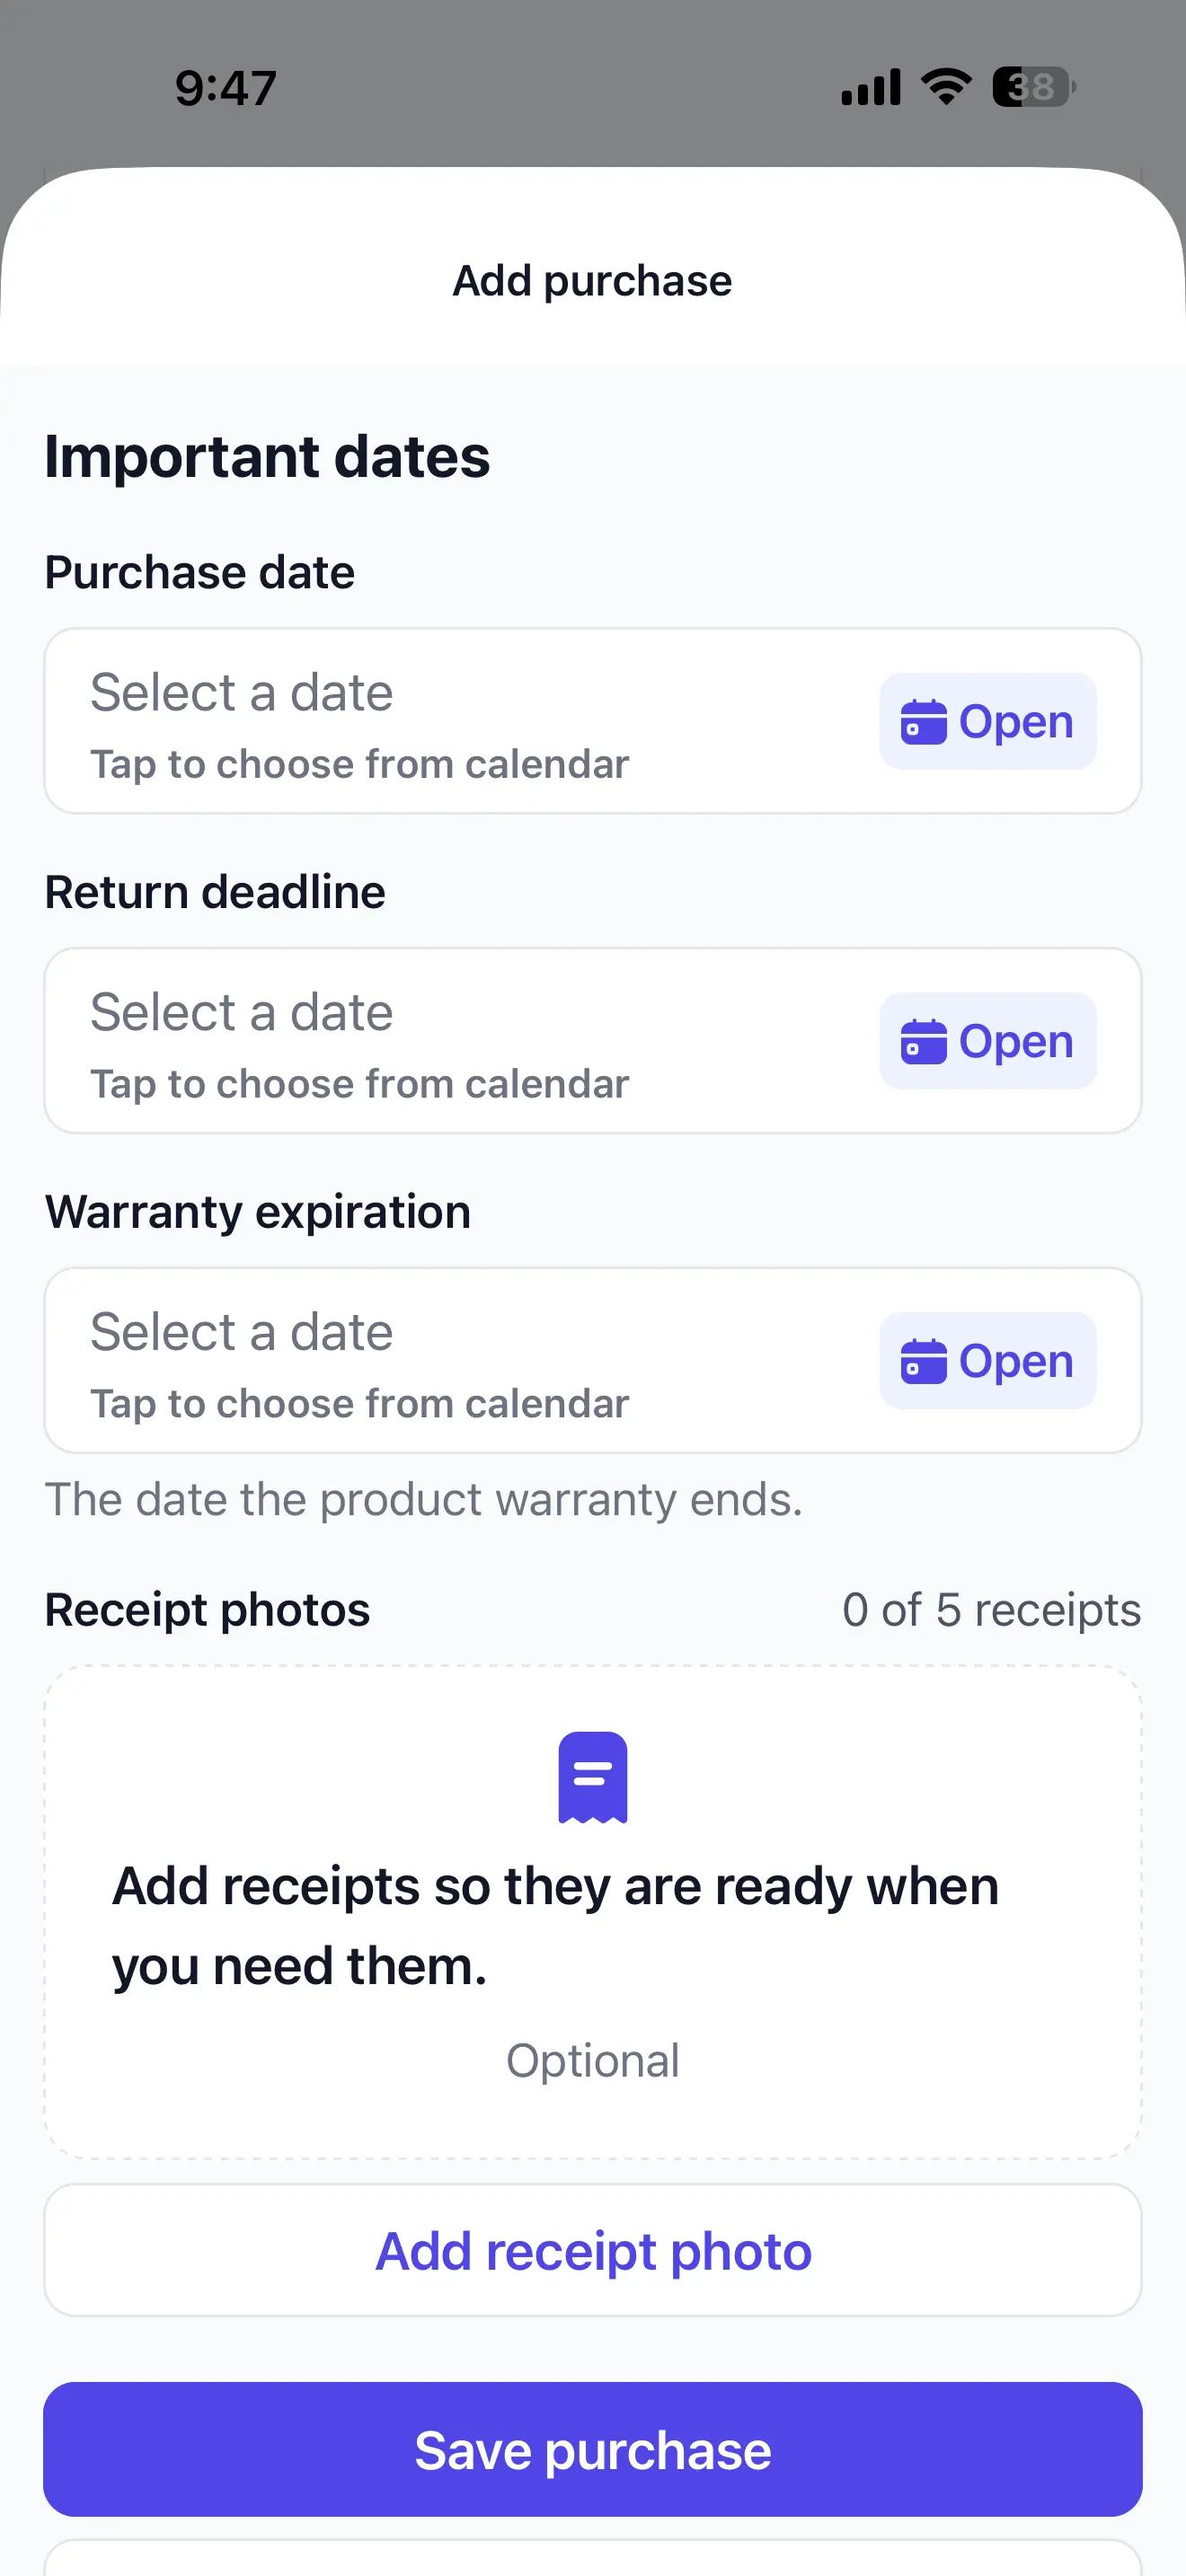
Add important dates
Add only the dates that are relevant to that purchase.
- Return deadline
- Expected refund date
- Warranty expiration
Step 3
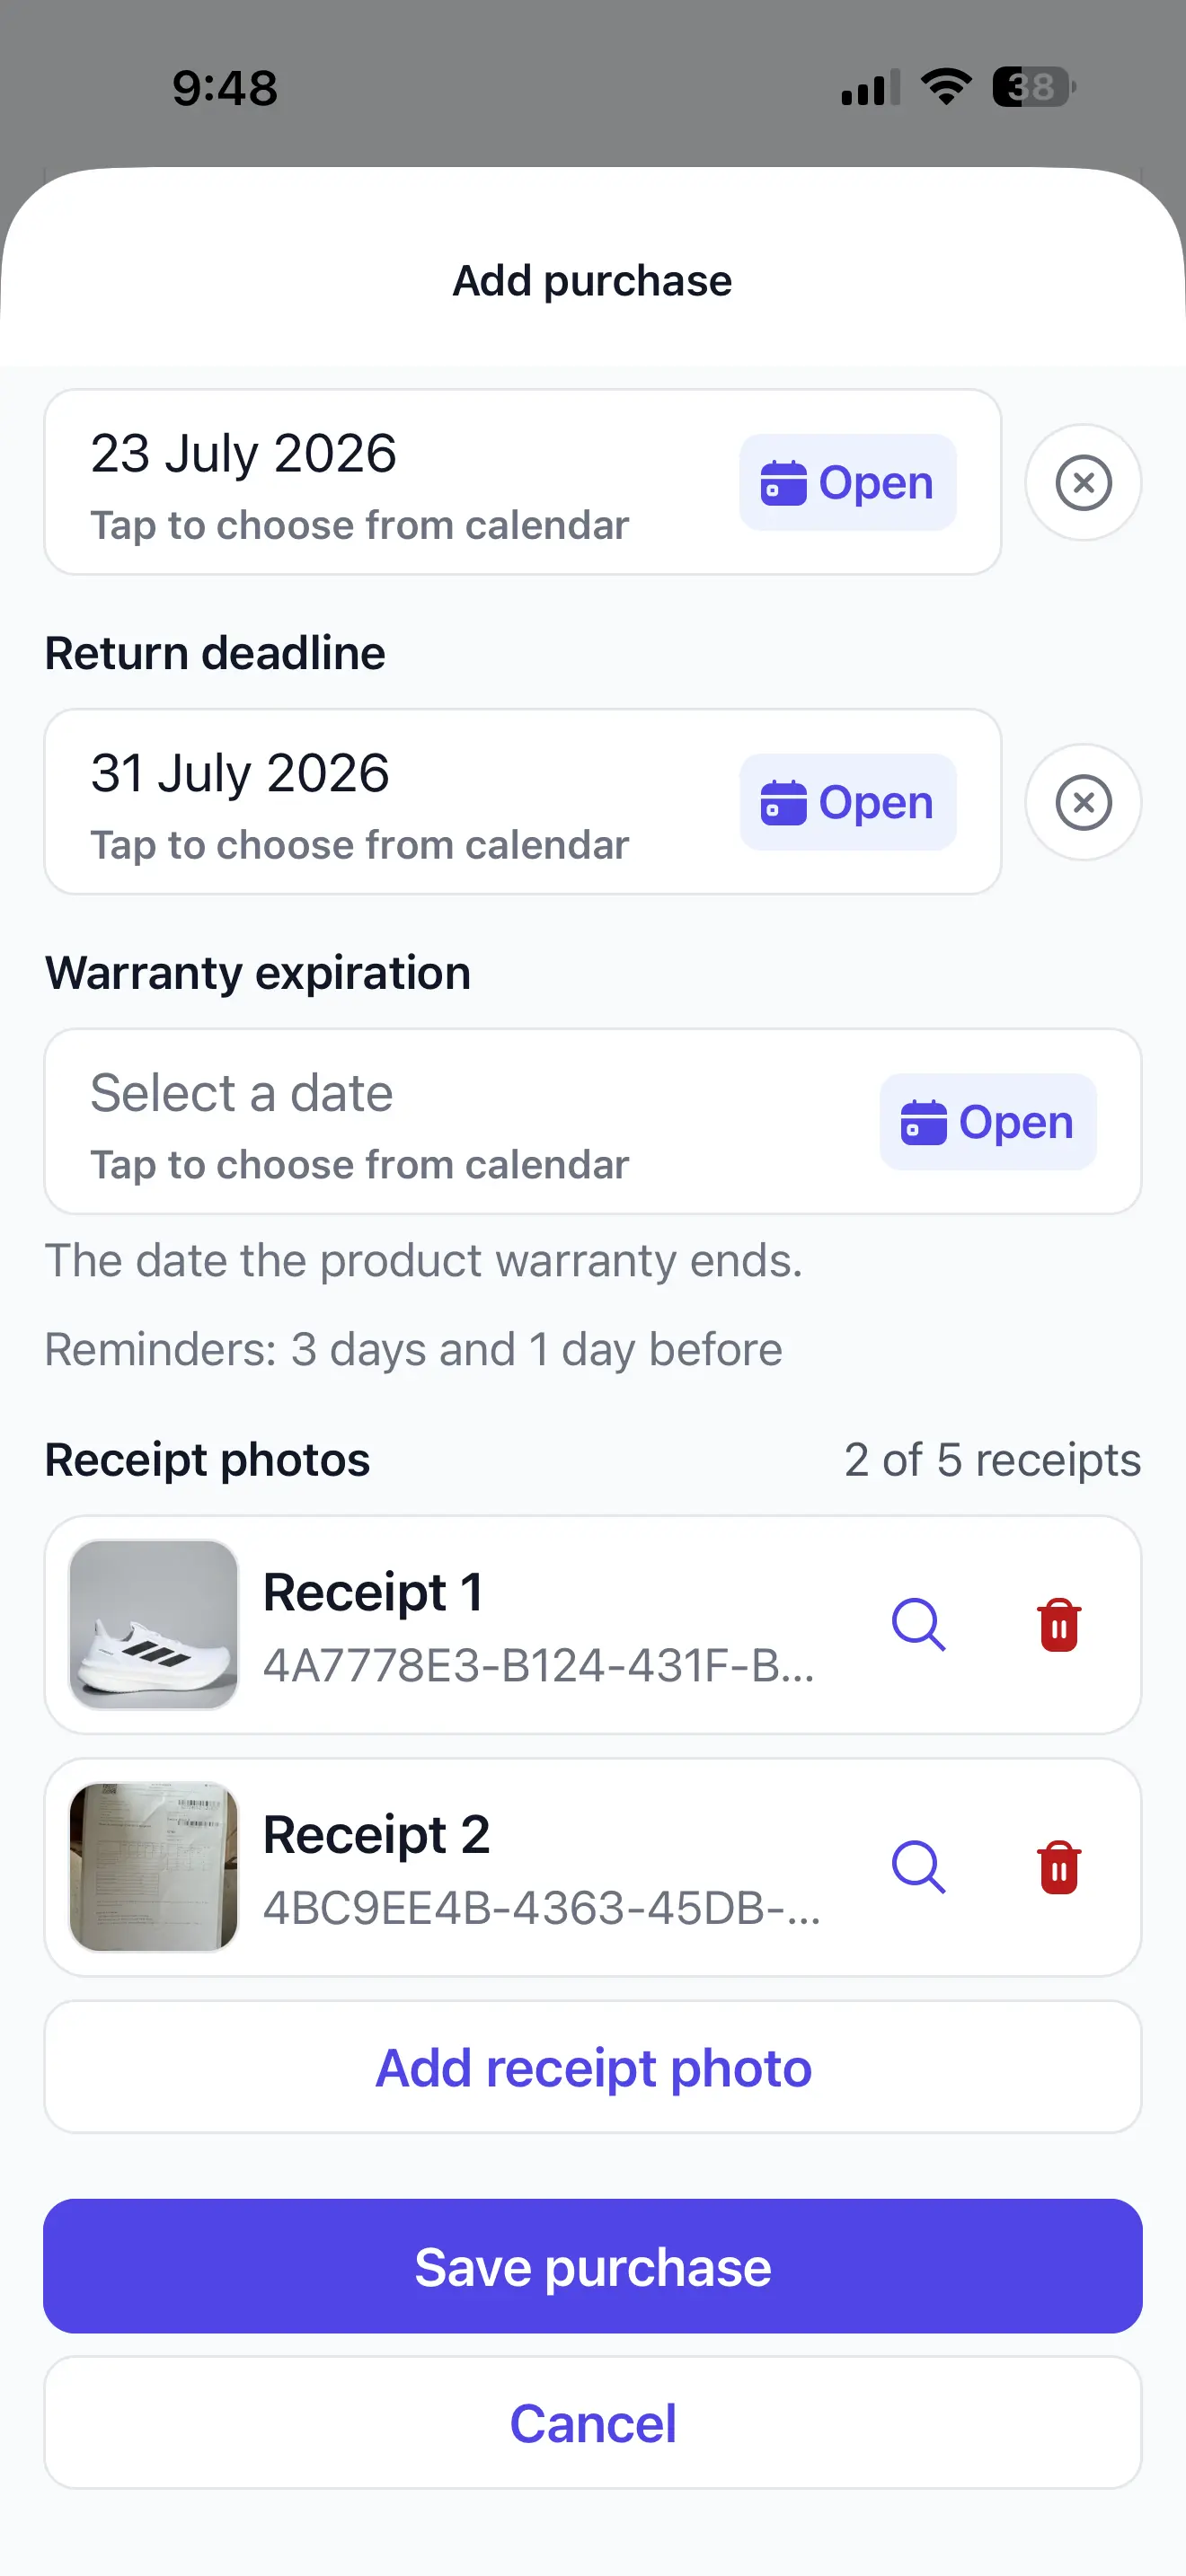
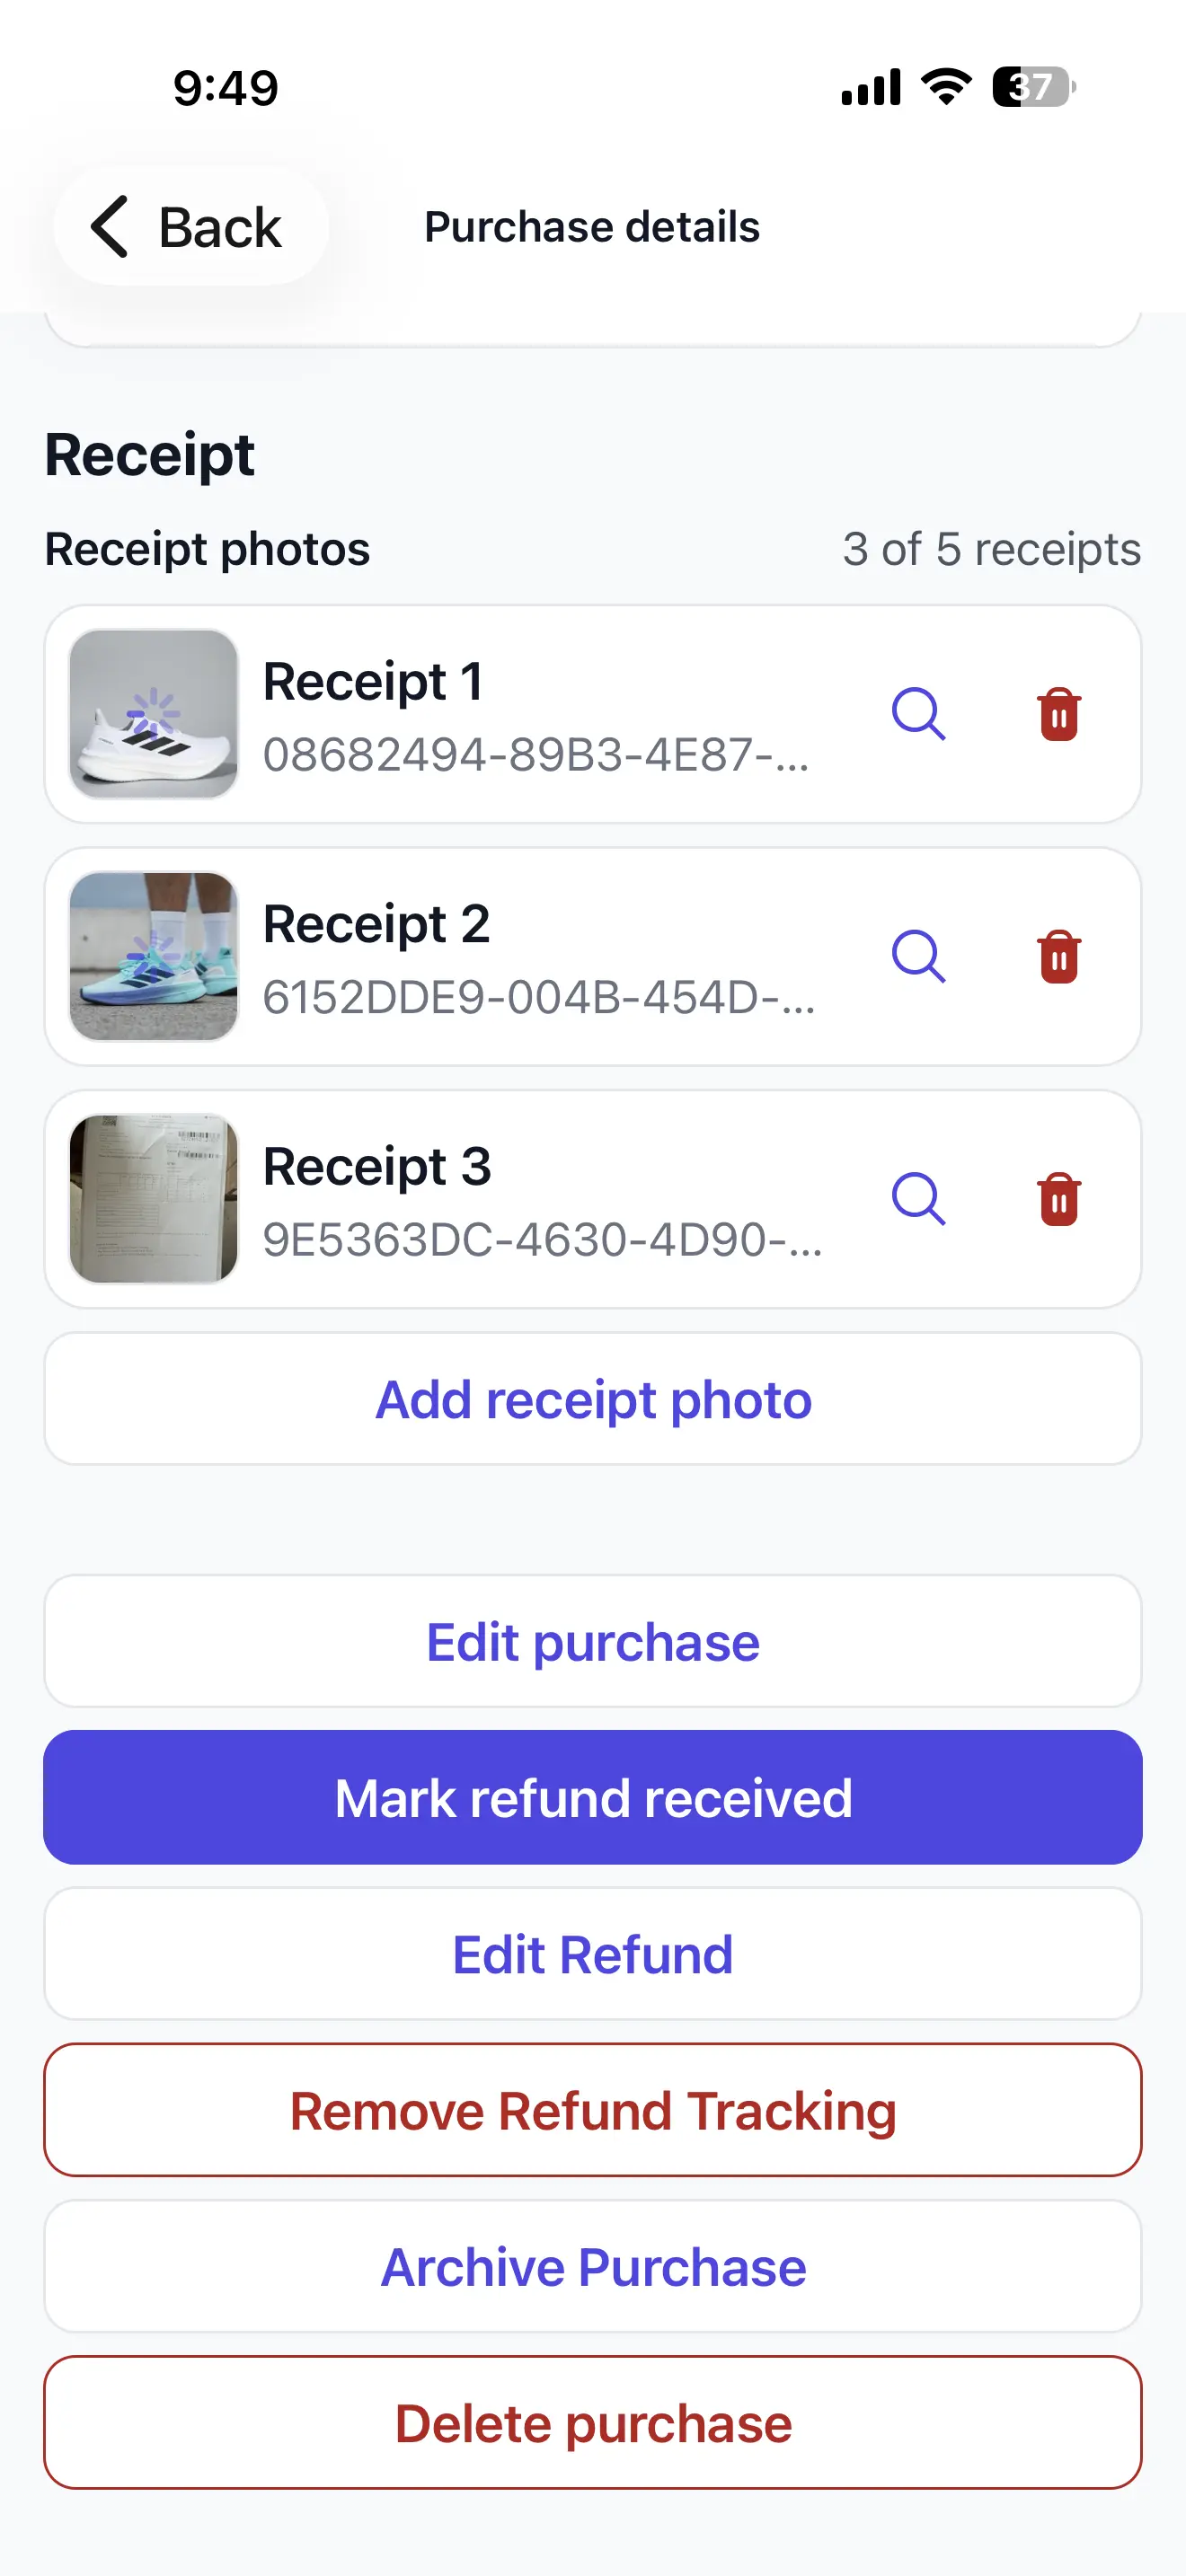
Attach a receipt
Choose a receipt or invoice image and attach it to the purchase for later reference.
- Select the image yourself
- Keep proof of purchase with the item
- No automatic receipt recognition
Step 4
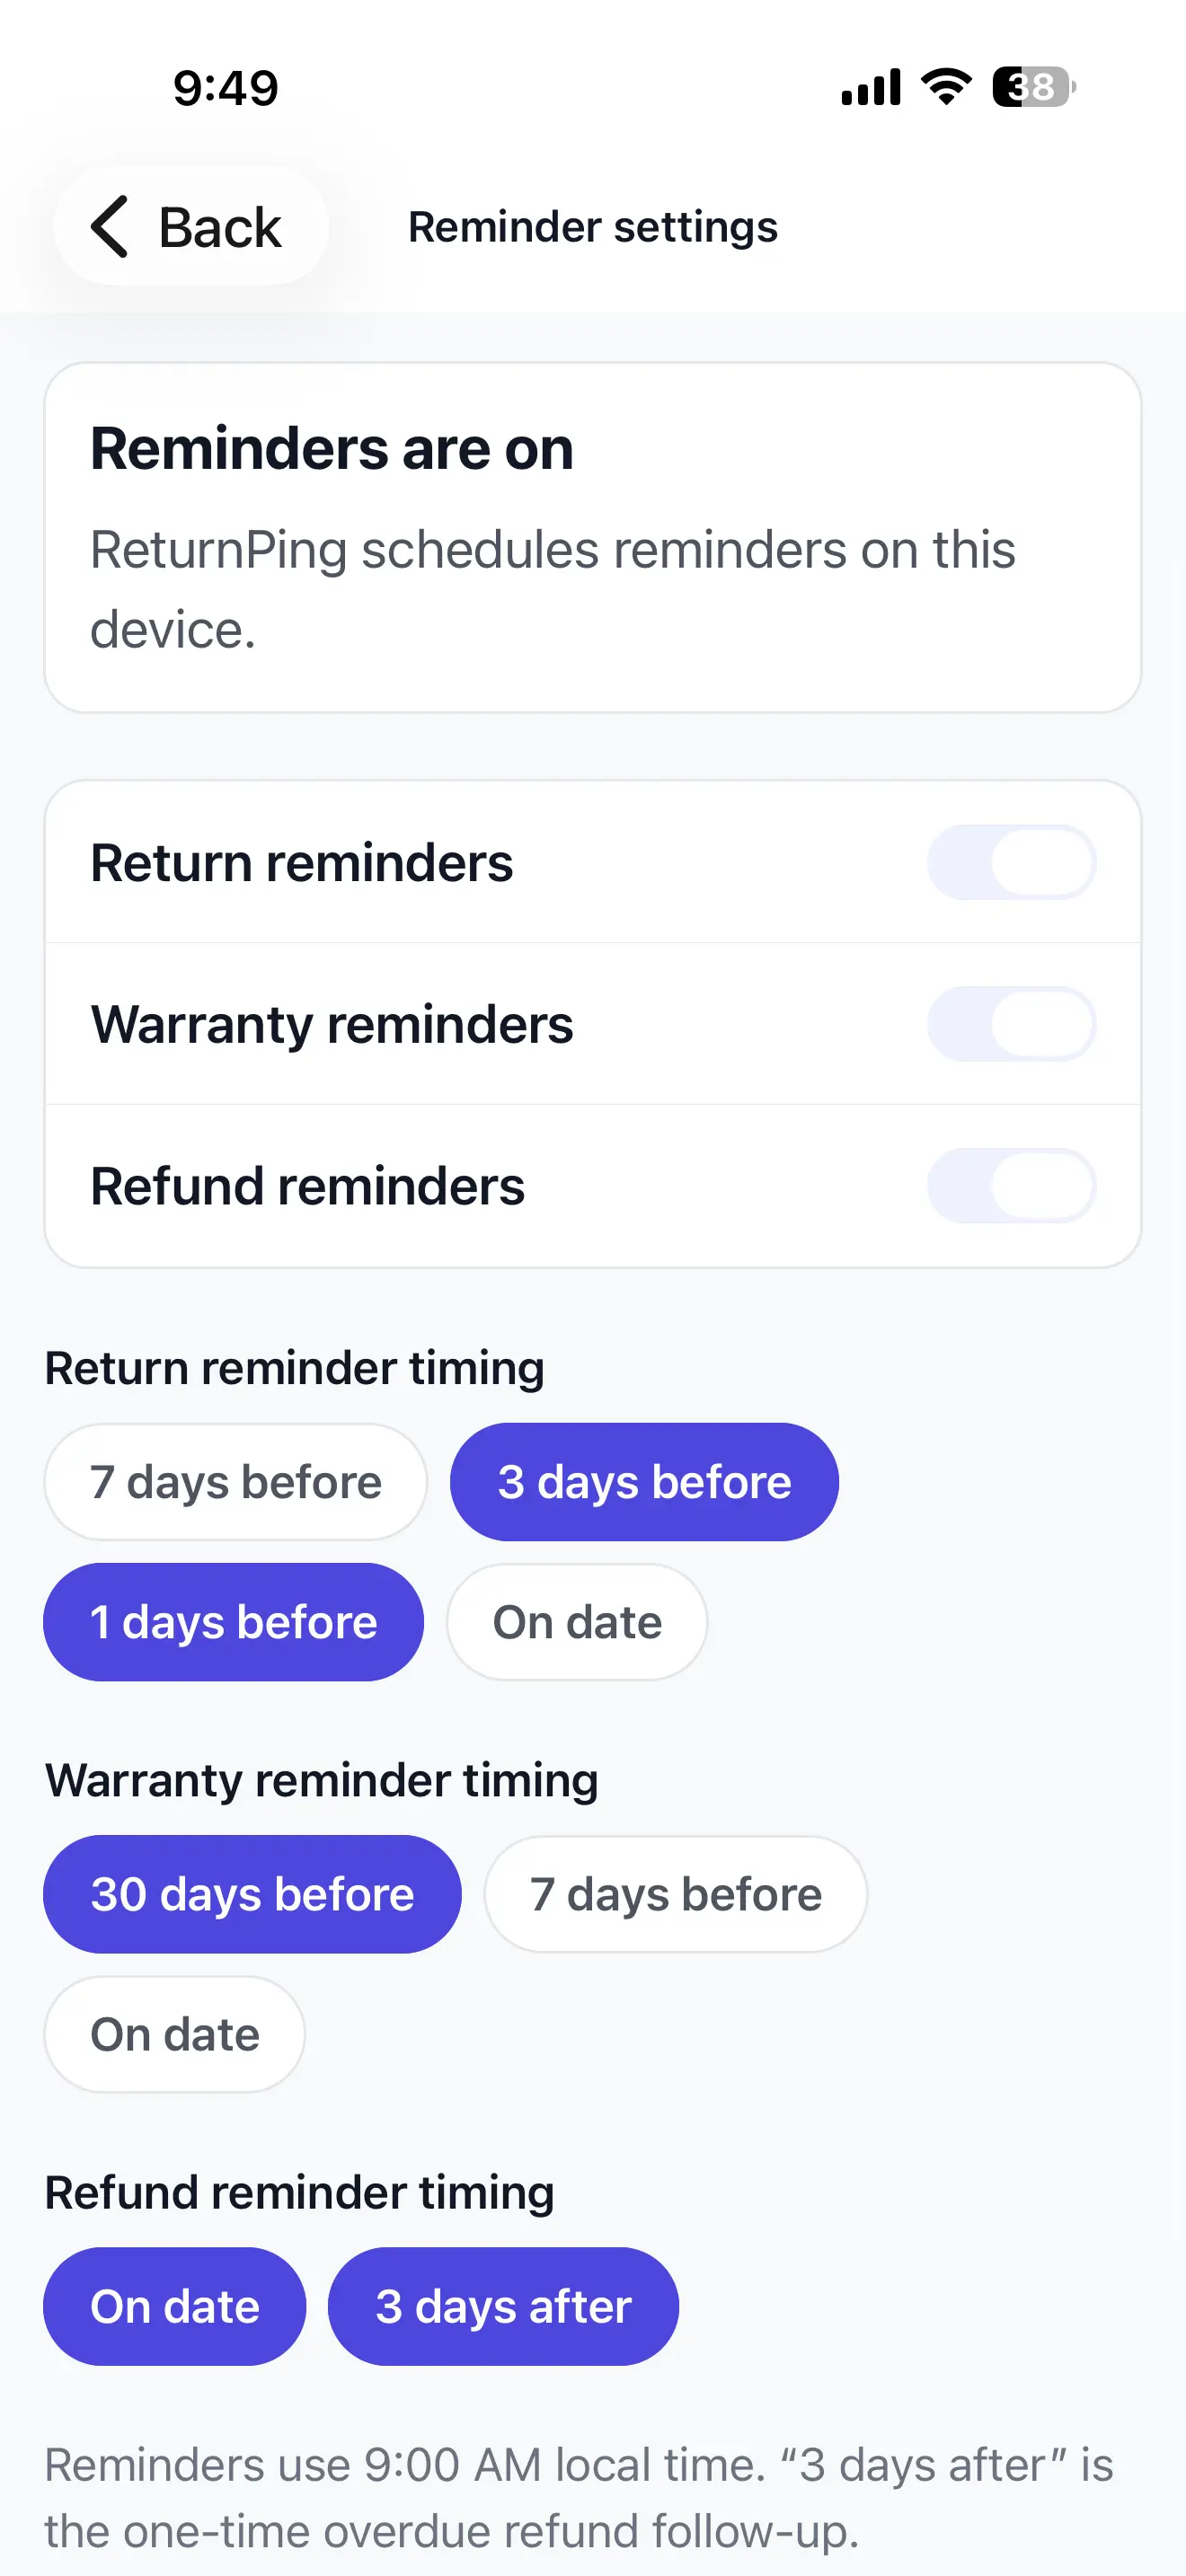
Choose reminders
Choose the reminder timing that is useful for the date you saved. Nothing is enabled automatically.
- Seven days before
- Three days before
- One day before
- On the saved date
Step 5
Update the lifecycle
Keep the purchase current as a return or refund moves forward.
- Mark as returned
- Add expected refund information
- Mark refund as received
- Keep warranty information available
Purchase lifecycle
One purchase. Every important date.
- Purchased
- Return deadline
- Returned
- Refund expected
- Refund received
Ready when you are